Delete Pending Updates in Windows 10
You can easily delete pending updates in Windows 10 by simply removing the files that Windows uses to install new updates. In this article, we will show you how you can do this easily and tell you why and when to do this for a safer and hassle-free user experience. So without further ado, here’s how you can easily delete, remove or cancel pending updates (both cumulative and feature) in Windows 10:
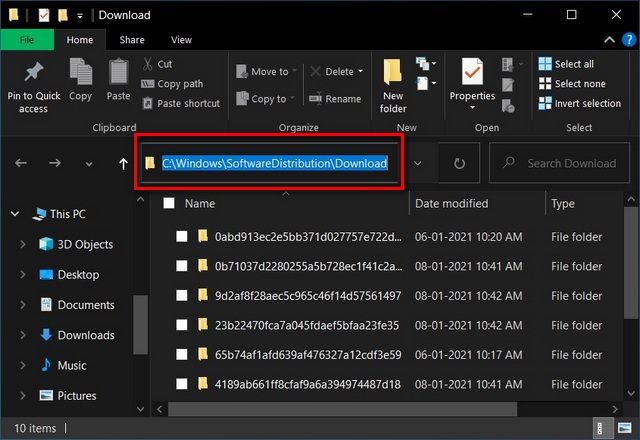
To delete pending updates in Windows 10, navigate to C:\Windows\SoftwareDistribution\Download.
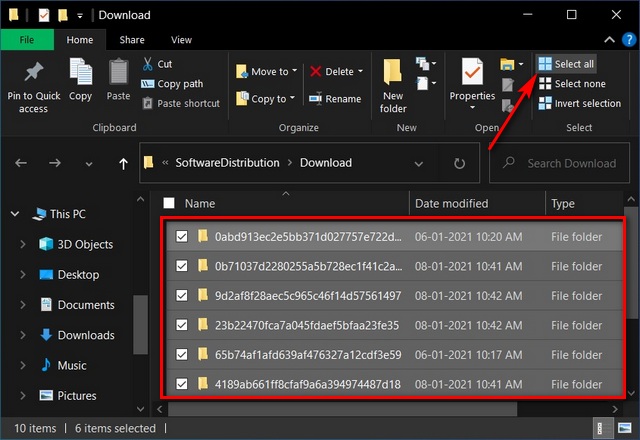
Now select everything in that folder (press Ctrl + A simultaneously or click on the ‘Select all’ option in the Home tab).
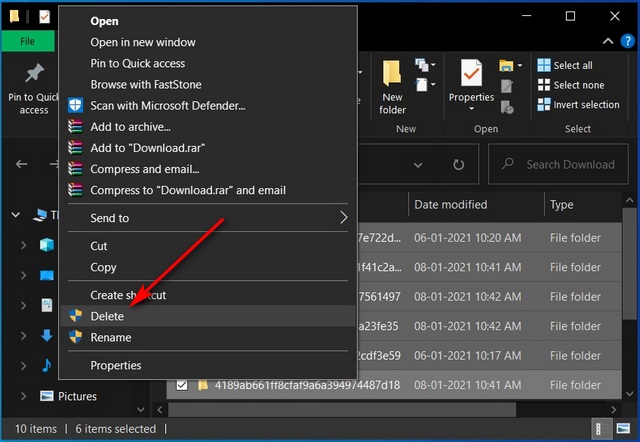
Finally, right-click anywhere on the selected files and select ‘Delete’. Confirm if asked.
That’s it. You’ve now deleted the cumulative update installation files from your PC. You can use this method to delete or remove both cumulative updates and feature updates on your Windows 10 device. Do note that your computer will again automatically download and install the files the next time it checks for updates. To prevent Windows from trying to install these updates again, you can hide these updates temporarily. However, unlike earlier versions, Windows 10 does not natively allow you to permanently disable automatic updates. There are hacks to do that, but that’s beyond the scope of this tutorial.
Stop Problematic Windows Updates From Installing on Your Computer
Windows Updates often brings new functionality, fixes critical bugs and adds new security features. However, it also sometimes adds new bugs and issues that can be immensely frustrating for many users. Now that you know how to delete pending updates on Windows 10, you can give it a go the next time there’s a new available update, but you are unwilling to install it on your system without ensuring that it’s safe enough for your device. Meanwhile, since you’re worried about new updates from Microsoft, you can also check out how to stop Windows 10 updates from installing automatically on your PC.


